
How To Use ConnectIPS?

12th December 2020, Kathmandu
How To Use Connect IPS
Connect IPS is a payment system brought into operation by Nepal Clearing House Ltd. By using this system, we can transfer money from one bank account to another. Also, any bill payment can be done by using Connect IPS.
Its maximum limit for payment is 1 lakh per day and 5 lakhs per month. All these payments can be done easily sitting at home through mobile or computer.
Here we will know how to create an account in Connect IPS, how to link it to our bank account, and how to do payment through it.

How to create an account in Connect IPS?
Here is the step-wise guide to creating an account.
- Firstly, go to connectips.com.
- If you have already created an account click on the sign-in button. If not, click on sign up.
3. Click on sign up and fill in all your general information and click on register.
Note: do not forget to mark on “I have read and agree with the Terms and Conditions”.
4. After you click on register, you will be successfully registered to Connect IPS. And now, enter your username which you used to register your account to sign in.
Verify and link your Account
- After you sign in, you will have to enter the password too which you used to get registered and click on submit.
- The dashboard of Connect IPS will appear. You need to verify your information through mobile and email. Click on “Get code for mobile” and “Get code for email” one by one.
- OTP will be sent to your email and mobile. Enter the OTP you received and click on verify.
- After your user information is verified, you need to link your bank account.
Advertisement

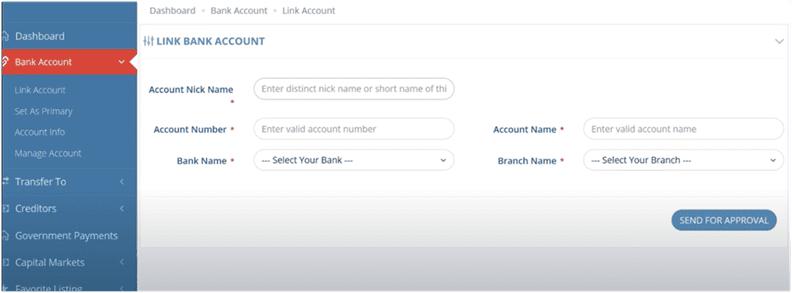
4. Fill in the details. In account nickname, write the short form of your bank, enter your account number, name, the branch where you created your account, and bank name. Then click on “send for approval”.
5. Your bank account details will appear on the screen. There you will see the “Download Form” button. Click on it and download the form.
You need to print out this form and sign on to them. Visit your bank branch and submit this form. As soon as you submit this form, they will carry out the further process. A few days later, your account will be approved.
More features of Connect IPS
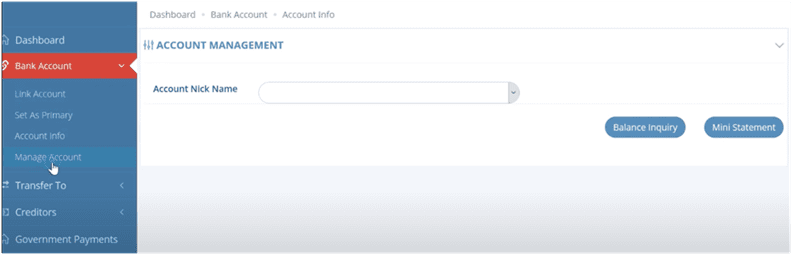
In “Manage Account” you can check whether your account is approved or not. If it is not approved, it will show ‘pending’ on account status.
After the account is approved, you will be able to perform a transaction through Connect IPS. Through this app, you can transfer money to your account, connectIPS user, bank account, and favorite account.
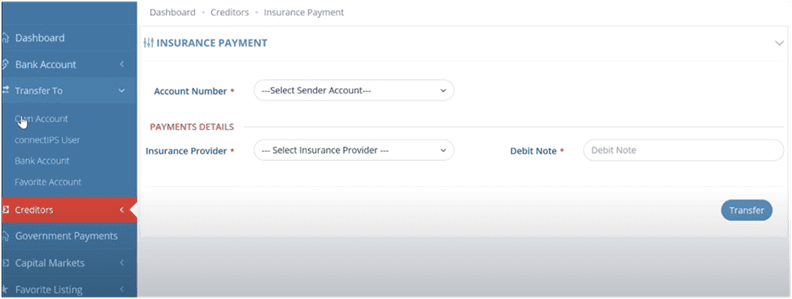
In the creditor’s option, you can do credit card payment, wallet top-up like esewa and Khalti, and also insurance payment. You can view all your transactions through the list transaction option.
Remember that you will need a smartphone or computer with internet access to use connectIPS. You can perform the transaction from wherever you want. They give you Rs. 100 as a reward as soon as you connect your bank account.


