
How to Use VPN on Windows: A Complete Step-by-step Guide

26th September 2020, Kathmandu
Using a VPN has become a necessity when it comes to surfing the internet securely. In fact, it isn’t only about getting access to some restricted sites as most people would think. From securing online identity to preventing data theft, a good VPN can make all the difference. In this article, we take a closer look at how to use a VPN on Windows and how to choose a good one.
Table of contents:
What is a VPN?
A Virtual Private Network (VPN) is a private network that acts as a security funnel between two or more devices.
It gives online privacy and anonymity to surf the internet by creating a private network from a public internet connection.
VPNs are used to protect your device and data from snooping and interference, just like any security tool.
Have you ever stumbled upon an offer or popup and accidentally clicked on it?
In times like these, you wished you were using a VPN.
Another example would be while browsing a torrent website.
If you are not using an ad blocker, you will know that clicking anywhere on a torrent site might redirect you to some other website.
That’s when using a VPN can help you download your torrent safely.
However, it is important to note that not all VPN may not deliver a satisfactory experience.

How to choose the right VPN?
Choosing the right VPN can make all the difference in your experience. Moreover, you have to make sure that the VPN you go with meets your requirements.
Let’s talk about what you should look for.
Ease of use – Not all of us are tech-savvy. Fortunately, most VPNs are easy to use with the option of connecting to a server within a few clicks. However, making sure of all the features is always better.
Security – All VPNs are meant for security at some levels but let’s also take some time to think about a backup. If your connection is lost, does the VPN provide a kill switch to block any traffic?
Usage – As much as we hate to say it but all VPN does not let you do what you want. There can be certain restrictions on what content is available and in which country.
Logs – Imagine you are browsing through a private window on your browser. You open the history and it showed all the sites visited. Certainly, you wouldn’t want that with your VPN either. However, it may depend on what logs do the tool keep and if you are on board, then it shouldn’t be a worry.
Pricing – The price tag on a VPN plays a huge role in deciding whether to go for it. There are also some brilliant options at affordable rates. Make sure to check out the long term plans or any special offers.
Free vs Paid VPN: What to choose?
All great things come at a price. So does VPN. Paid VPNs are better in terms of quality of service and level of security.
Besides that, there are more features and settings to enhance your internet surfing experience. Furthermore, paid VPNs are ads-free.
Although, there are a few decent alternatives that are free and give you exactly what you need. However, free VPNs often have limitations in customer service, security, and server locations.
So, if you are serious about your online privacy and want to maintain anonymity, you should opt for a paid service.
How to use a VPN on Windows: Getting Started
Most of the time using a VPN is straightforward whether it’s on Windows, iOS, or Android. All you have to do is:
- Download and install the VPN
- Set up the VPN and adjust a few settings
- Connect to a VPN server
That’s about it!
You can find the download button or link on an official website. Then, you can double-click the downloaded file to get started with the installation.
Advertisement

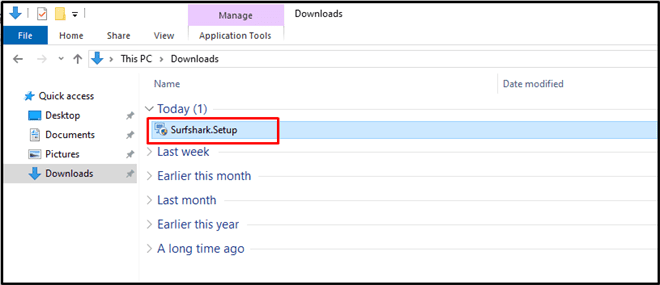
When the installation is complete, open the application and wait for it to start. Some applications might start automatically after installation, depending on your Window settings.
Here comes the part that separates a free and a paid VPN!
You need to log in if you have an active subscription to the VPN. If not, there might be limited features to use for free.
Upgrading to the premium version is always an option.
To do that, you can sign up or create an account.
Some VPNs such as Surfshark offer two-factor authentication, which is always better in terms of account security.
When you have created an account and logged in, simply tap Connect or whatever the button on the screen says. If the connection is successful, VPNs usually show a ‘connected’ status.
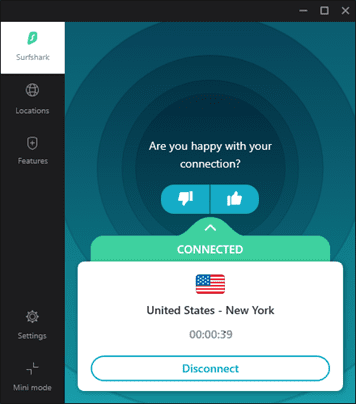
To disconnect, simply click on the Disconnect button.
Choosing a VPN Server
By now you probably have learned how to use a VPN. However, tapping Connect would normally connect you to a default server location.
Look for a menu option that allows you to choose a server location. Some VPNs have an option to choose from the Fastest or the Nearest server.
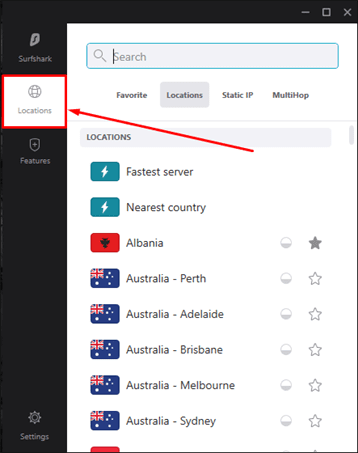
However, you can choose from many countries. For example, Surfshark has over 1700 servers in 63+ countries. Meanwhile, ExpressVPN offers 160 server locations in 94 countries, as of now.
Talking about managing server locations, most VPNs have a feature to bookmark your favorite locations.
Connecting to these locations requires just a single tap. And, the same goes for disconnecting!
Managing VPN Settings and Features
It is important to make sure you are aware of the settings and features of your subscription. In fact, you can do much more than just change your password from the settings.
You have options such as:
- Update your subscription plan
- Earn by referral (depending on the service provider)
- Changing the app language
- Configure Auto-connect, notification, Kill Switch
- Enable dark mode (not all VPNs may have this option)
Besides these, there are advanced settings that you can configure if you know your way around it. Otherwise, we recommend not to mess with the advanced settings.
Let’s also talk about some features that VPNs usually provide while we are at it.
Specifically paid versions of VPN allow users to choose which apps or sites to exclude from the VPN connection. You wouldn’t want to browse some of your favorite social media apps through a VPN.
Similarly, there are features, when enabled, can block potentially dangerous ads and malware. Some VPNs also offer real-time notification when your credentials are at risk of being hacked.
What we recommend
It’s definitely Surfshark that comes on top for me. Other VPNs such as ExpressVPN and Nord might have impressive security features but I think Surfshark comes at an affordable rate for what it offers.
The interface of this VPN service on Windows is quite clean and easy to navigate through. The feature that impressed me is the CleanWeb that blocks ads and malicious sites automatically.
There’s so much security vulnerability that you can be exposed to on the web, especially on Windows. I found that Surfshark has answers to all of that.
However, your personal experience may vary.


 Promotes Prasiddha Raj Aryal and Suvash Jamarkattel to Senior Leadership Roles")